
Disclosure: This article contains affiliate links. If you purchase through one of these links, I may earn a commission at no additional cost to you.
Learning how to start a website can feel like a technical project with far too many decisions. You need a domain, a platform, web hosting, a design, and enough content to make the finished site useful. That sounds like a lot, especially if this is your first time building anything online.
The good news is that you do not need to become a developer before you can put a professional website online. You also do not need to buy every tool that appears in a YouTube tutorial or spend three weeks comparing tiny differences between hosting plans.
In this guide, I will show you how to start a website from scratch one practical step at a time. I will explain what you actually need, what you can skip, how to choose between WordPress and a website builder, and what to check before you click the publish button.
By the end, you will have a clear path from your first idea to a working website that people can visit. You will also know how to avoid the frustrating mistakes that often slow beginners down.
How to Start a Website in the Simplest Possible Way
If you want the short version, starting a website comes down to six stages:
- Decide what the website needs to achieve.
- Choose a platform that fits that goal.
- Register a domain name.
- Choose web hosting if your platform requires it.
- Create the essential pages and content.
- Test everything and launch the site.
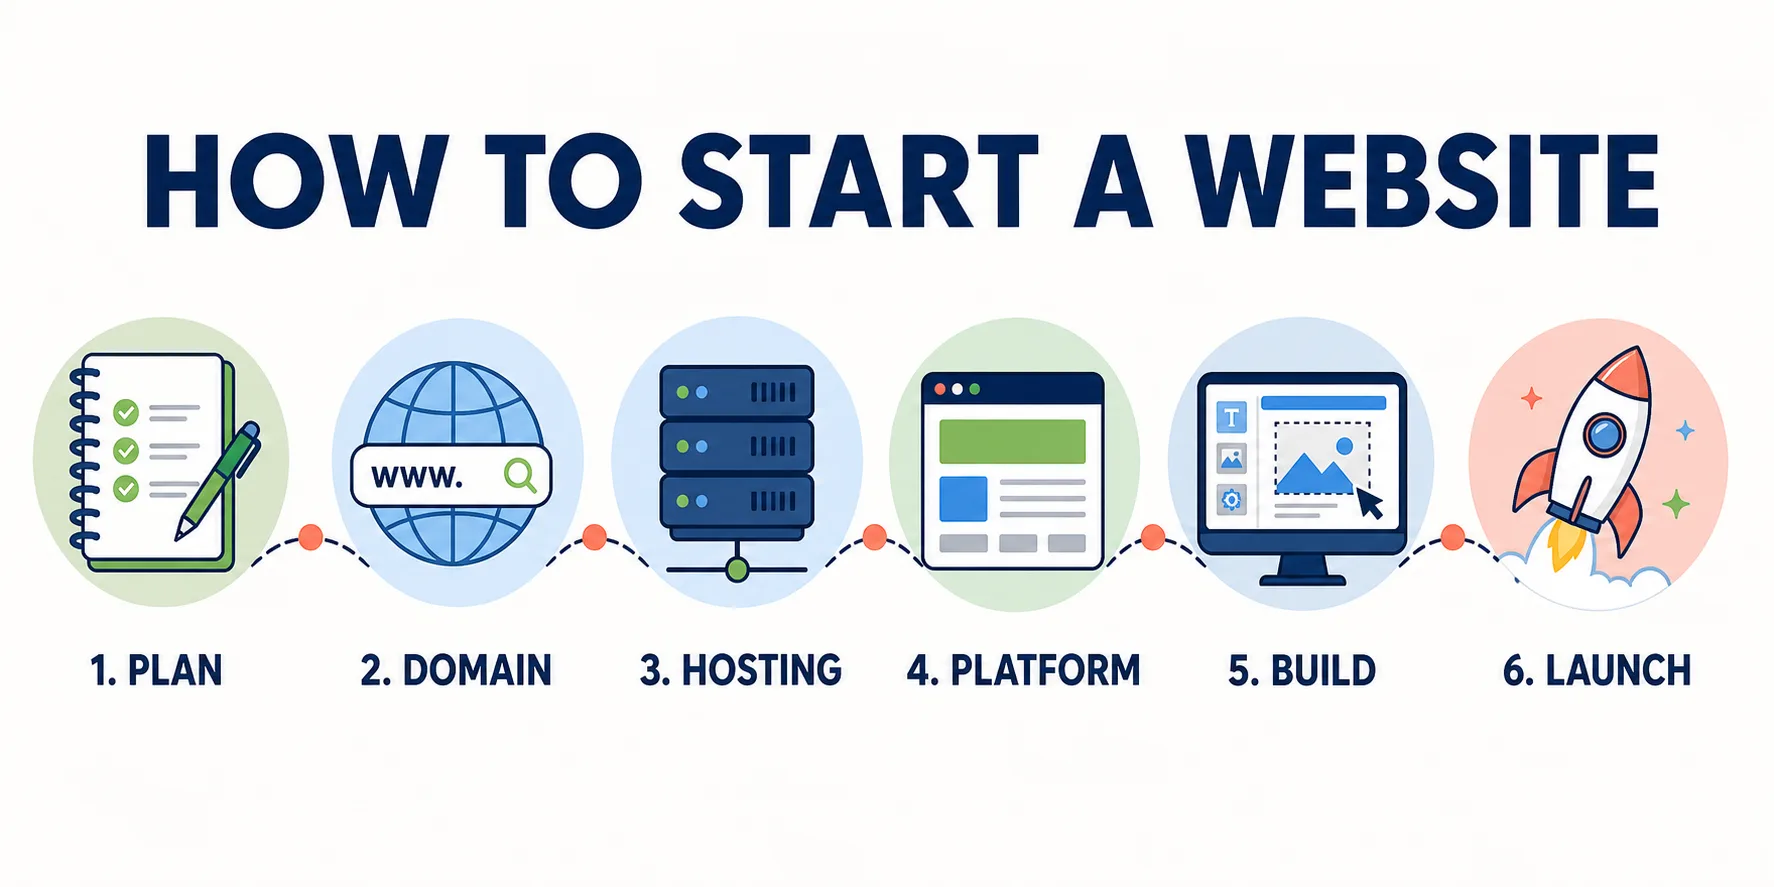
You can complete these stages with a website builder, WordPress, or custom development. For most beginners, I would narrow the choice to a website builder or WordPress. Both can produce a professional result without requiring you to write code.
The right option depends on what you want to build, how much control you want, and how comfortable you are with learning a few new tools. Let us sort that out before you spend any money.
Step 1: Decide What Your Website Needs to Achieve
Before choosing colors, themes, or hosting plans, I would define the job of the website. A site built to display a photography portfolio needs a different setup from a store with hundreds of products. A local service business needs strong contact and lead generation features, while a blog needs excellent publishing and content organization tools.
Start by writing one sentence that explains the result you want. For example:
- I want to publish useful articles and grow an audience.
- I want potential clients to discover my services and contact me.
- I want to display my work and win freelance projects.
- I want to sell physical or digital products online.
- I want to create a simple professional presence for my business.
That single sentence will make the next decisions much easier. It tells you which features matter and which tempting extras can wait.
| Website goal | Essential features | Good starting approach |
|---|---|---|
| Start a blog | Posts, categories, email signup, SEO controls | WordPress |
| Promote a business | Service pages, contact form, testimonials | WordPress or a website builder |
| Build a portfolio | Project pages, galleries, contact details | Website builder or WordPress |
| Sell products | Checkout, payments, product management | Ecommerce platform or WordPress with WooCommerce |
| Generate leads | Landing pages, forms, analytics, clear calls to action | WordPress or a website builder |
I would also think about the person who will visit the website. What are they trying to accomplish? What questions will they have? What would make them trust the site? A clear audience helps you choose better pages, write better copy, and avoid designing a website that only makes sense to its owner.
Step 2: Choose How You Want to Build Your Website
There are three common ways to build a website: use a website builder, install a content management system such as WordPress, or hire someone to develop a custom site. The third option can be valuable for complex projects, but it is rarely necessary for a first website.
Website builders
A website builder combines the visual editor, templates, hosting, and many basic features inside one service. You choose a template, edit the sections, add your content, and publish.
I like this route for beginners who want to launch quickly and do not need unusual functionality. It reduces the number of technical decisions and usually takes care of updates and hosting behind the scenes.
The tradeoff is that you are working inside one provider’s system. Moving the finished website elsewhere may be harder, and advanced customization can be limited by the builder.
WordPress
WordPress is a content management system that gives you more control over the site. You can choose from a large ecosystem of themes and plugins, publish almost any type of content, and move the site between compatible hosting providers.
I would strongly consider WordPress for a content-focused site, a growing business website, or a blog. It takes a little more setup than a website builder, but the flexibility is valuable when the project grows.
WordPress itself is not the same thing as web hosting. A self-hosted WordPress site needs a hosting account and a domain. Many hosting companies simplify the process with automatic installation and managed WordPress features.
Custom development
A custom site gives a developer control over the code and architecture. That can make sense for a web application, a unique customer portal, or a business with requirements that ordinary platforms cannot handle.
For a basic blog, portfolio, or small business site, custom development often adds cost and maintenance without adding much practical value. I would start with the simplest platform that can support the next few years of the project.
Step 3: Choose a Domain Name
Your domain is the address people type to reach your website. A good domain is easy to remember, easy to say, and difficult to mistype.
I would keep the name short, avoid confusing spelling, and skip numbers or hyphens unless they are genuinely part of the brand. A domain does not need to contain an exact SEO keyword. A clear and memorable brand is usually more valuable than an awkward phrase created for search engines.
Before registering anything, check these points:
- Is the name available in the extension you want?
- Can someone spell it after hearing it once?
- Does it resemble another company’s trademark?
- Are matching social media handles available?
- What will the renewal price be after the first term?
- Will the name still make sense if the project expands?
The familiar .com extension is a solid choice for an international business, but it is not the only valid option. A country extension can make sense for a local audience, while extensions such as .org may fit certain organizations. Choose the extension that matches the purpose and audience instead of chasing novelty.
Step 4: Choose the Right Web Hosting
Web hosting stores the files and database that make your website available online. If you choose an all-in-one website builder, hosting is normally included. If you choose self-hosted WordPress, you need a hosting plan.
Beginners will usually encounter shared hosting, managed WordPress hosting, cloud hosting, and VPS hosting. The names can sound intimidating, but the basic differences are straightforward.
Shared hosting
Shared hosting places multiple websites on the same server infrastructure. It is generally affordable and easy to manage, which makes it a practical starting point for a new blog, portfolio, or small business website.
Managed WordPress hosting
Managed WordPress hosting adds tools and support designed specifically for WordPress. Depending on the provider and plan, that may include automatic updates, backups, security features, caching, and an easier installation process.
Cloud and VPS hosting
Cloud and VPS plans provide more resources or control. They can be useful for busy websites, stores, applications, and projects with technical requirements. A brand new informational website rarely needs to begin here.
I would compare plans using practical criteria:
- Enough storage and bandwidth for the expected website
- SSL support so the site can use HTTPS
- Automatic or easy backups
- Data center locations near the target audience
- Responsive customer support
- A control panel that a beginner can understand
- A clear renewal price and cancellation policy
- An upgrade path if the website grows
Ready to put your website online?
I recommend checking Hostinger’s current hosting plans for a beginner-friendly way to get started. Use coupon LEONARDO for an extra 10% discount.
Do not choose a host based only on the lowest number displayed on a sales page. Check what is included, how long the promotional term lasts, and what the plan costs when it renews. The cheapest plan is not a bargain if it is missing something you need.
Step 5: Connect Your Domain and Install Your Platform
Once you have a domain and hosting, you can connect the two and install the platform. If you buy both from the same provider, much of this may happen automatically. If they come from different companies, you will normally update the domain’s nameservers or DNS records.
The exact menu labels vary by provider, but the overall process looks like this:
- Add a new website inside the hosting dashboard.
- Select WordPress, a website builder, or another supported platform.
- Connect an existing domain or register a new one.
- Create the administrator login for the website.
- Complete the installation and open the new site.
- Confirm that the HTTPS version loads without a warning.
Hostinger currently lets users begin with a CMS such as WordPress, upload an existing website, or use its website builder. Interface details can change, so I recommend following the prompts shown in the current hosting dashboard instead of relying on screenshots from an old tutorial.
Use a unique password for the administrator account. Do not use admin as the username if you can choose something less predictable, and save the credentials in a trusted password manager.
Step 6: Plan a Simple Website Structure
A website is easier to build when you know which pages it needs. I would sketch the structure before spending time on fonts, colors, and tiny design details.
A simple business website might look like this:
Home
About
Services
Blog
  Category
  Article
Contact
Keep the main navigation short and use labels that visitors immediately understand. Creative menu names may feel clever, but they can make a simple task unnecessarily confusing. If the page contains services, call it Services. If it contains contact information, call it Contact. No detective work required.
Think about growth too. A blog should have a sensible category structure. A service business should be able to add individual service pages later. Planning this now prevents a messy navigation system after the site has dozens of pages.
Step 7: Choose a Clean, Mobile-Friendly Design
A good design helps visitors understand the content and take the next step. It does not need to impress other designers or use every animation available in the template library.
I would start with a lightweight theme or template that already works well on phones. Use readable fonts, strong color contrast, generous spacing, and a consistent visual style. Make the navigation easy to find and keep important buttons clear.
Customize the design around the content instead of forcing the content into a complicated demo template. Remove sections you do not need. Replace every placeholder. Check that images have a consistent style and that buttons do not change color randomly from one page to the next.
Most importantly, open the site on a real phone. A layout can look perfect in a desktop editor and still produce tiny text, crowded buttons, or an enormous image on a smaller screen.
Step 8: Create the Pages Your Website Actually Needs
The exact list depends on the website, but most professional sites need a small group of core pages.
Homepage
The homepage should quickly explain who the site is for, what it offers, and what the visitor should do next. Use a clear headline, a short explanation, and a visible call to action. Do not make visitors scroll through five vague slogans before discovering what the business does.
About page
The About page builds trust by explaining the person or organization behind the website. Include accurate information about the mission, background, and relevant experience. This is not the place for invented credentials or generic claims about being passionate.
Services or products
If the website represents a business, create a clear page for what it sells. Explain the problem, the offer, who it is for, and how someone can buy or request more information.
Contact page
Provide a reliable way to get in touch. A simple form is often enough. Ask only for information you genuinely need and test the form before launching.
Privacy and legal pages
Your legal requirements depend on where you operate, where your visitors live, what data you collect, and what the website sells. Common pages include a privacy policy, terms, cookie information, and affiliate disclosures. I would use qualified legal guidance or a reputable compliance service instead of copying another website’s policies.
Blog
A blog can answer customer questions, attract search traffic, demonstrate expertise, and create natural paths to products or services. Publish content because it helps the intended audience, not because an SEO tool produced a list of loosely related phrases.
Step 9: Add Essential Features Without Overloading the Site
Plugins and integrations are useful, but every extra tool adds something to maintain. I would begin with the essentials and add new features when there is a real need.
Depending on the platform, the starting list may include:
- A contact form
- Backups
- Security controls
- Analytics
- SEO settings
- Caching and performance tools
- Image optimization
- An email signup form
Avoid installing several plugins that perform the same job. More plugins do not automatically create a better website. They can create conflicts, slow down the administration area, and give you more updates to manage.
Step 10: Make the Website Fast and Secure
Performance and security are not tasks to postpone until the website becomes popular. A few good habits at the beginning can prevent a surprising amount of trouble.
- Confirm that HTTPS works across the entire site.
- Use strong, unique passwords and enable two-factor authentication when available.
- Keep the platform, themes, and plugins updated.
- Configure regular backups and learn how to restore one.
- Compress large images before uploading them.
- Use caching that is compatible with the hosting environment.
- Delete unused themes, plugins, and administrator accounts.
- Choose reputable extensions and download them from trusted sources.
Speed is not about chasing a perfect score while breaking the design. The goal is a site that loads quickly and works reliably for real visitors. Test important pages on mobile and pay attention to oversized images, unnecessary scripts, and features that add visual noise without helping the reader.
Step 11: Prepare Your Website for Google
Search engine optimization begins with making the website understandable and useful. I would not begin by repeating the same keyword in every paragraph. That makes the writing awkward and does not magically create authority.
Start with these fundamentals:
- Give each important page a descriptive title.
- Write a unique meta description that accurately summarizes the page.
- Use one clear H1 and logical H2 and H3 headings.
- Use the words real visitors use when searching for the topic.
- Add descriptive alt text to meaningful images.
- Create internal links between genuinely related pages.
- Use short, readable URLs.
- Make sure the site works on mobile devices.
- Check that search engines are not blocked after launch.
Most content management systems can generate an XML sitemap automatically. Connect the website to Google Search Console, verify ownership, and submit the sitemap if needed. A sitemap helps search engines discover URLs, but it does not guarantee that every page will be indexed.
Google’s own SEO Starter Guide recommends useful, well-organized, original content written for readers. That is a much better long-term foundation than trying to trick an algorithm with filler.
Step 12: Test Everything Before You Launch
A launch checklist catches small problems before visitors find them. I would test the website as if I knew nothing about it and had arrived from a search result.
- Open the site on a phone, tablet, and desktop screen.
- Test the current versions of major browsers.
- Click every navigation item and important button.
- Submit every form and confirm that the message arrives.
- Check spelling, formatting, and placeholder content.
- Confirm that the preferred HTTPS address loads.
- Add the site title, logo, and favicon.
- Test important pages for obvious performance problems.
- Confirm that analytics is recording visits.
- Make sure the site is not accidentally set to discourage search engines.
- Create a fresh backup.
Ask another person to complete the website’s main action, such as finding a service, submitting a form, or reading an article. Fresh eyes often notice confusing labels and missing information immediately.
What Does It Cost to Start a Website?
The cost depends on the platform, domain, hosting, design, and functionality. A simple website can begin with a domain and an entry-level hosting or builder plan. A custom store or application can require professional development and ongoing technical support.
Potential costs include:
- Domain registration and annual renewal
- Monthly or annual web hosting
- A premium theme or template
- Paid plugins or applications
- Professional email
- Design, writing, photography, or development
- Security, backups, and maintenance
Always check the current checkout price and renewal terms before buying. Hosting promotions change, and a price shown today may not be the price available next month. I would build the first version around the essentials and upgrade only when the website has a clear reason to need more.
What to Do During Your First 30 Days
Launching the website is the beginning, not the finish line. During the first month, focus on making the site more useful and reliable.
- Publish the essential pages and make sure they answer the most important visitor questions.
- Create the first pieces of useful content around the site’s main topic.
- Connect analytics and Google Search Console.
- Fix errors discovered by visitors or testing tools.
- Add internal links as new pages are published.
- Set a realistic content or promotion schedule.
- Check backups and updates every week.
Do not panic if Google does not send traffic immediately. New sites need time, useful content, discovery, and trust. Keep improving the website instead of redesigning the homepage every four days. Yes, changing the button color again can wait.
Common Website-Building Mistakes I Would Avoid
Choosing a platform without thinking about growth
The fastest tool today may become restrictive later. Think about the content, integrations, and features you are likely to need over the next few years.
Buying hosting based only on the introductory price
Compare the included features, term length, renewal price, support, and upgrade options. A clear total cost is more useful than the biggest discount badge.
Installing too many plugins
Begin with the essentials. Add a plugin because it solves a real problem, not because a list called it mandatory.
Ignoring mobile visitors
Test the actual site on an actual phone. Check text size, buttons, forms, navigation, and images.
Launching without backups
A backup is useful only if it runs reliably and can be restored. Know where the backups are stored and how long they are retained.
Copying competitors
Research can reveal useful patterns, but copying another site’s structure and wording does not create a strong brand. Build something that genuinely serves your audience.
Expecting instant traffic
A new website needs useful pages, promotion, links, and time. Measure progress, keep publishing, and improve content based on real questions from readers.
Frequently Asked Questions
Can I start a website for free?
You can experiment with some platforms for free, but free plans often use a branded subdomain and limit features, storage, customization, or monetization. A paid domain and basic hosting or builder plan provide a more professional foundation.
Do I need web hosting to start a website?
Every public website is hosted somewhere. With an all-in-one website builder, hosting is normally included. With self-hosted WordPress, you choose and purchase a compatible hosting plan.
Do I need to know how to code?
No. WordPress and modern website builders allow beginners to create professional sites without writing code. Basic HTML and CSS can be useful later, but they are not prerequisites for launching.
Is WordPress good for beginners?
WordPress can be a good option for beginners who want flexibility and are willing to learn the dashboard, themes, and plugins. A website builder may be easier for someone who prioritizes speed and simplicity over advanced control.
How long does it take to create a website?
A simple website can be assembled quickly, but the real timeline depends on content, design decisions, features, and review. Preparing accurate copy and useful pages often takes longer than installing the software.
How much does it cost to keep a website online?
Ongoing costs can include domain renewal, hosting, premium tools, email, maintenance, and professional services. Review both introductory and renewal prices before choosing a platform or host.
Can I change my hosting provider later?
Yes, most self-hosted websites can move to another provider. The migration process depends on the platform and hosting companies involved. Some providers offer migration services or tools that simplify the transfer.
Your Next Step Is to Put the Website Online
You now know how to start a website without turning the process into a six-month research project. Define the goal, choose the platform, register a clear domain, select suitable hosting, create the essential pages, and test everything before launch.
The first version does not need every feature you may want someday. It needs to work, help its intended audience, and give you a foundation you can improve.
Start building your website today
Explore Hostinger’s current hosting options and use coupon LEONARDO for an extra 10% discount.